People are very into continuous integration/continuous delivery because they mistake
This is the third and last part of a three-part series about CI/CD. In the first two parts, we first built a basic generic Kubernetes cluster and then installed a cloud-native Gitlab (with SSO) in it and used it to manage a secondary project-specific Kubernetes cluster. In this last part, we tie this setup together with the simplified CI/CD solution I presented earlier to achieve a damn fine integrated CI/CD street.
- Generic Cluster Setup: how to get running with a generic cluster that is relatively independent of the cloud provider, but provides basic services like a package manager, SQL database and
reverse proxy. Also includes a couple of basic infrastructure applications. - Installing Gitlab: Setting up the new cloud-native Gitlab helm chart including running it with production-ready storage options.
- Development Street Improvements (this part): Various Java-specific improvements to the CI/CD pipeline I introduced previously.
I’ve previously hinted there might be a fourth part to this series; that’s no the case. The fourth part was intended to detail how I got Gitlab CI/Fabric8/Maven to play nice with a proper DTAP street as I thought that would be complicated and interesting, but it turns out that the approach I took to improving my Fabric8 setup made this near trivial and doesn’t warrant its own part (at least not for now).
Java Development Street
We’re using Maven for building applications. For the development street, we need a binary repository supporting Maven artifacts and a few development tools. A lot of this I already went thru in my original post, so we’re still using the Gitlab registry for docker images and fabric8 to build them. While the application is a Spring Boot 2 application, we do not assume that.

Maven Binary Repository
Maven stores binary artifacts in a repository. Such a repository is just a glorified web-server, but two companies have inexplicably built a large business on making such products: Sonatype (Nexus) and JFrog (Artifactory). We would like something cloud-native(ish) which supports using our SSO. Unfortunately,
Nexus is a bit shit. It stores data in a proprietary database on a persistent storage and has a tendency to corrupt this database. On the up-side, it is supposed to be able to store artifacts in an object storage. I never got that working and just gave up.
Artifactory is less shit, but hides almost everything behind a paywall, including storing data in a object storage and OAuth2
For that reason, I gave up on both products and looked for something simpler. It turns out, we don’t really need to use a repository manager anymore. Instead, we just install a Maven Wagon supporting the desired repository. There’s one for Amazon S3 and one for Google Cloud Storage. A minor problem is that such extensions are not supported for parent poms if put in the pom.xml, but that can be worked around by creating
<extensions xmlns="http://maven.apache.org/EXTENSIONS/1.0.0" xmlns:xsi="http://www.w3.org/2001/XMLSchema-instance"
	xsi:schemaLocation="http://maven.apache.org/EXTENSIONS/1.0.0 http://maven.apache.org/xsd/core-extensions-1.0.0.xsd">
	<extension>
		<groupId>com.gkatzioura.maven.cloud</groupId>
		<artifactId>google-storage-wagon</artifactId>
		<version>1.0</version>
	</extension>
</extensions>
This is just stored with the project, and now we can set project repositories using a gs:// URL like this:
	<repositories>
		<repository>
			<id>ocs-snapshot</id>
			<url>gs://maven-cicd/snapshots</url>
		</repository>

		<repository>
			<id>ocs-release</id>
			<url>gs://maven-cicd/releases</url>
		</repository>
	</repositories>
Here, we’re using the same bucket for snapshots and releases, but we can split that as we prefer. I just use my local
On the build server, I do not have Google Cloud SDK installed, so instead I create a service account as we’ve seen multiple times and give it project Viewer access (important!) and Storage Object Admin rights. We create a JSON key like normal. We then base64 encode the JSON file:
base64 -i gcloud-service-account.json
And dump the result into a secret build variable in Gitlab:
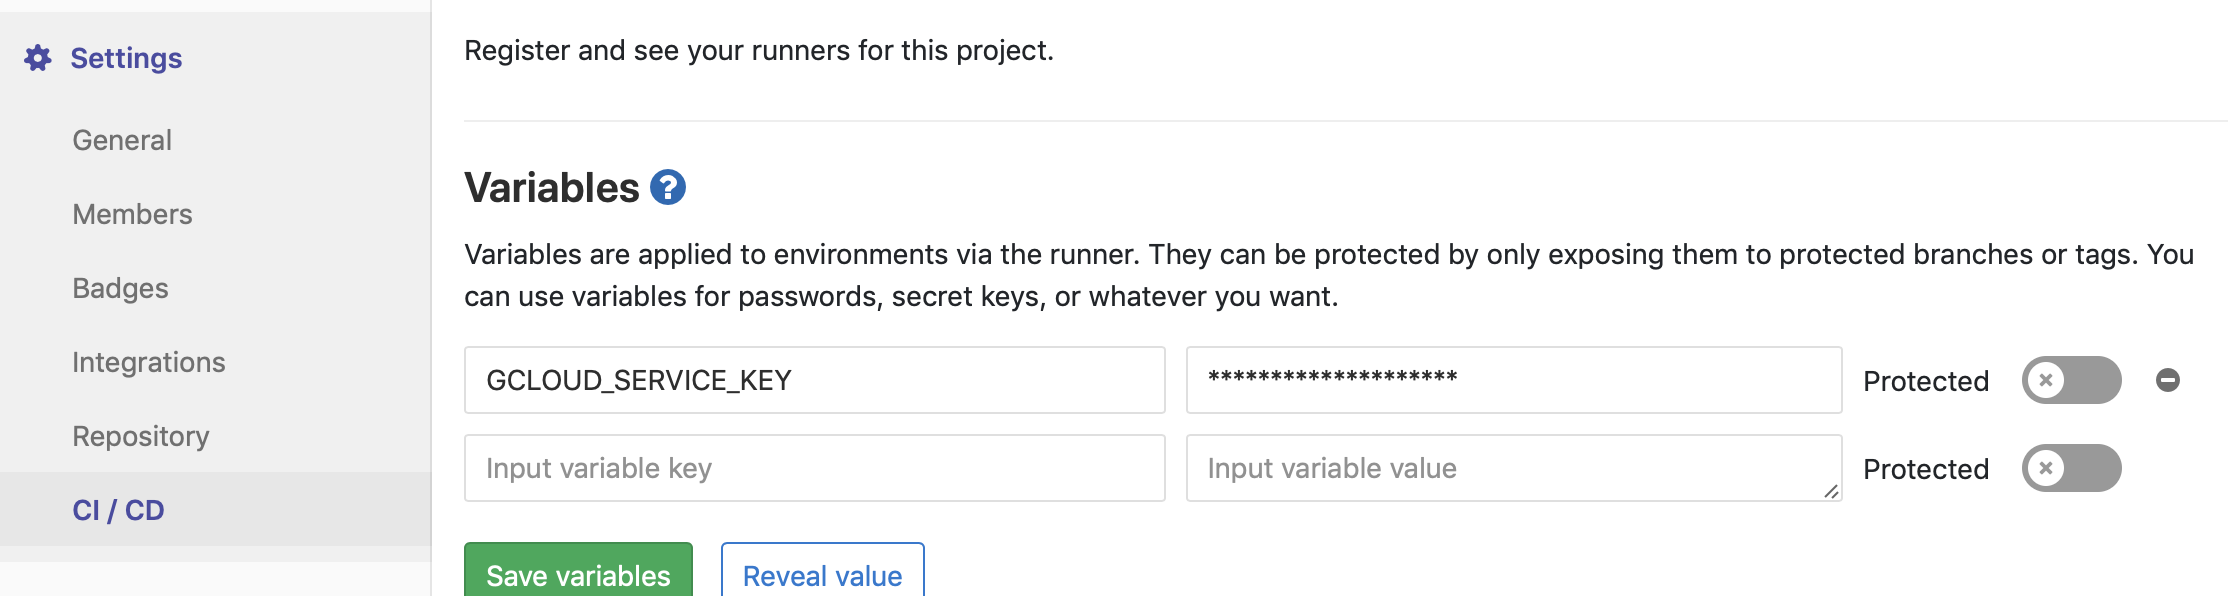
Now, we include this in the preabble of the project .gitlab-ci files:
variables:
      GOOGLE_APPLICATION_CREDENTIALS: /root/gcloud-service-key.json

before_script:
      - echo "$GCLOUD_SERVICE_KEY" | base64 -d > "$GOOGLE_APPLICATION_CREDENTIALS"
We set a variable indicating that our credentials are stored in /root/gcloud-service-key.json and make sure to unpack the value from the variable before each execution step (each step may be
Now, we can deploy and fetch artifacts from GCS from both developer machines as well as from the build server. Artifacts are just stored as objects, which means we’ll never run out of space and don’t need to provision (and pay for) space up-front. The only downside is that we’ll have to clean up the repository manually (i.e., we’ll have to write a small application that cleans up snapshot deployments according to some rule).
Development Tools
Some of our developers like to use Sonar for checking code. Luckily, there’s a helm chart for that. It is possible to set that up to use an external PostgreSQL database and to install plugins on deployment. That way, it is possible to deploy it without persistent storage. Using this guide, we configure it to use Keycloak for SSO.
Deployment Keys
Last time we talked about deploying to Kubernetes from Gitlab CI, we had to manually patch the deployment description and set up an ad-hoc secret.
Since then, Gitlab has introduced the notion of a deployment token, which is exactly what we need: a secret we can use to fetch deployments from the docker registry.
We still need to patch the fabric8 Kubernetes description, but we can now just create a deployment token:
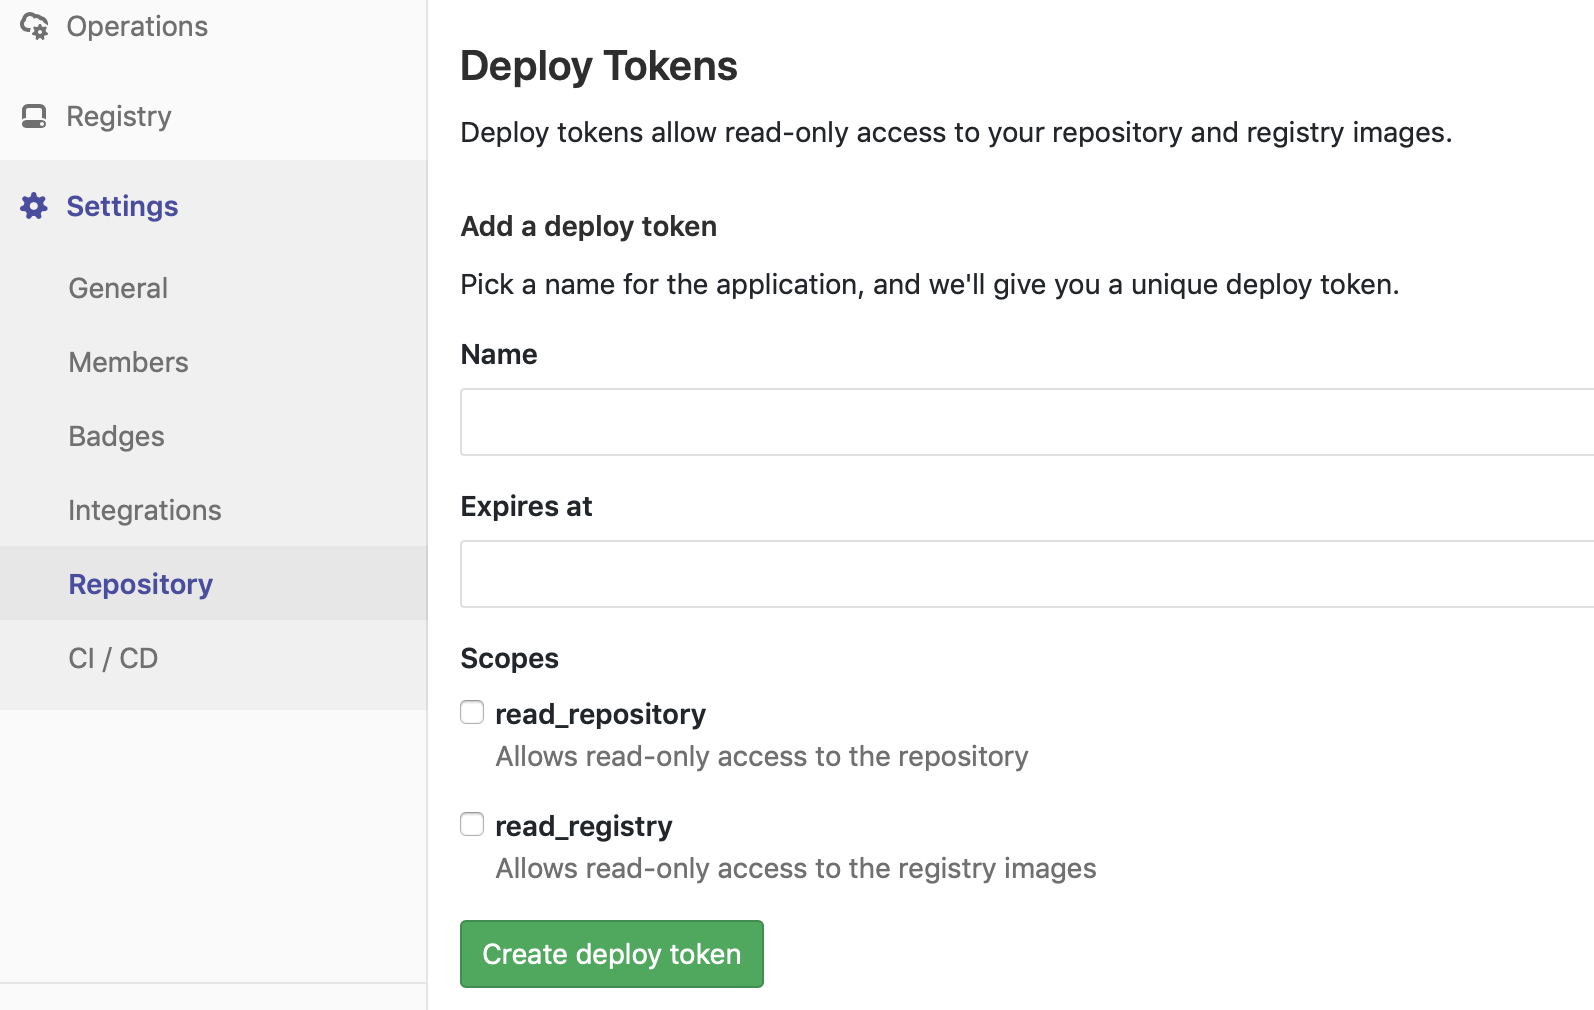
Using this token, we can create a permanent secret:
CI_REGISTRY_USER="TOKEN FROM GITLAB"
CI_REGISTRY_PASSWORD="PASSWORD FROM GITLAB"
KUBE_NAMESPACE="NAMESPACE CONFIGURED IN CLUSTER"
CI_REGISTRY="GITLAB REGISTRY URL"
GITLAB_USER_EMAIL="ANY EMAIL IS GOOD"

kubectl create secret -n $KUBE_NAMESPACE docker-registry gitlab-registry --docker-server="$CI_REGISTRY" --docker-username="$CI_REGISTRY_USER" --docker-password="$CI_REGISTRY_PASSWORD" --docker-email="$GITLAB_USER_EMAIL" -o yaml --dry-run | kubectl replace -n $KUBE_NAMESPACE --force -f
The last bit is one long line. Now, using the same patch routine as before, we’ll get a (permanent) secret that can be used for deployment. This has the advantage that if Kubernetes decides to migrate or scale your application, it will work (compared to before where the secret was only valid during the deployment).
Configuration of Registry Secret, Ingress, Resource Allocation, Analytics, and DTAP
You wouldn’t think these diverse topics would have anything in common, except being good conversation starters on Tinder, but I ended up solving them all in the same way.
In the previous version of the CI/CD pipeline, you might remember a particularly inelegant solution as the last part of the build_image task: we need to patch the generated Kubernetes YAML: descriptor to include the deployment key, then created dynamically during the deployment process and here set up in Gitlab explicitly in the previous section.
Well, the configuration of the registry secret is not the only thing that is best configured by altering the generated descriptor, actually, the ingress, resource allocation, analytics are all clear candidates for things that just need adding or adjust a bit of configuration in the generated descriptor.
The ingress is an entirely new
Instead of dealing with all kinds of textual search and replace operations as part of the pipeline (and the inevitable escaping and double and tripe escaping of characters in regular expressions anybody who has ever done regular expression matching using sed in a Makefile will be all too familiar with), I instead looked deeper at Fabric8. Fabric8 already has an enricher mechanism. This mechanism makes it possible to alter the generated descriptor any way we want without having to resort to textual shenanigans.
Fabric8 comes with a full object model for a ton of Kubernetes resources and at least contains all the configuration parameters I needed. I used this enricher as a starting point and created a package comprising 5 new enrichers.
A couple of caveats when creating new enrichers:
- make sure you create
a src /main/resources/META-INF/fabric8/enricher-default file listing all your enrichers so Fabric8 can pick them up - resources are represented as a tree of fluent builders for some arbitrary and dumb reason, and you have to end all resources you add or edit using the fluent builders
- make sure you create a new profile including your new enrichers as well as any existing ones you want to use
Other than that, creating new enrichers is fairly straightforward. I would show you mine, but they do not belong to me, so I’ll see if I am allowed to open source them.
My 5 enrichers take care of the below:
- One just adds the imagePullSecret
as set in the pom.xml. - Another adds a prometheus.io/path annotation to the generated service; we do this because the default (/metrics) doesn’t jive with the Spring Boot default (/
prometheus in our example) and the built-in Prometheus enricher stupidly cannot set this property. - The next add resource annotations to our deployment; this is not strictly necessary, but very useful to help Kubernetes scale your cluster. Without such annotations, your applications will request 0 CPU and memory,m leading to Kubernetes (at least at Google) to happily provision 10 applications each using 200 MiB on a single node with 1 GiB memory, causing it to randomly kill pods.
- I created an enricher for adding ingresses; Fabric8 relies on a cluster service to expose services with annotation exposed = true, but for simple services, I do not want to rely on the entire Fabric8 platform, so I just statically generate an ingress for all services with this annotation.
- The final enricher takes an environment name as
parameter and adds this asannotation to all deployments and services. In addition, it augments all names with the environment (so instead of a deployment “webapp ” we get a “production-webapp ” or “test-webapp “), and adds the environment as part of the ingress (so webapp.westergaard.edu becomes webapp.test.westergaard.eu).
The 5th enricher makes it trivial to set up a fancy DTAP street: each deployment will have a unique name and unique annotations allowing us to deploy multiple environments to the same cluster or (if we have the more expensive premium version of Gitlab) separate clusters.
I have changed the pipeline so it is itself able to remove the SNAPSHOT from the version and commit a new tag to the repository (we have to alter the origin to use ssh and use a deployment key with write access to push back to the repository as outlined here); that way I can kick off a couple new pipelines directly from Gitlab to release a new version.
That means my pipelines com in two versions, short and long:
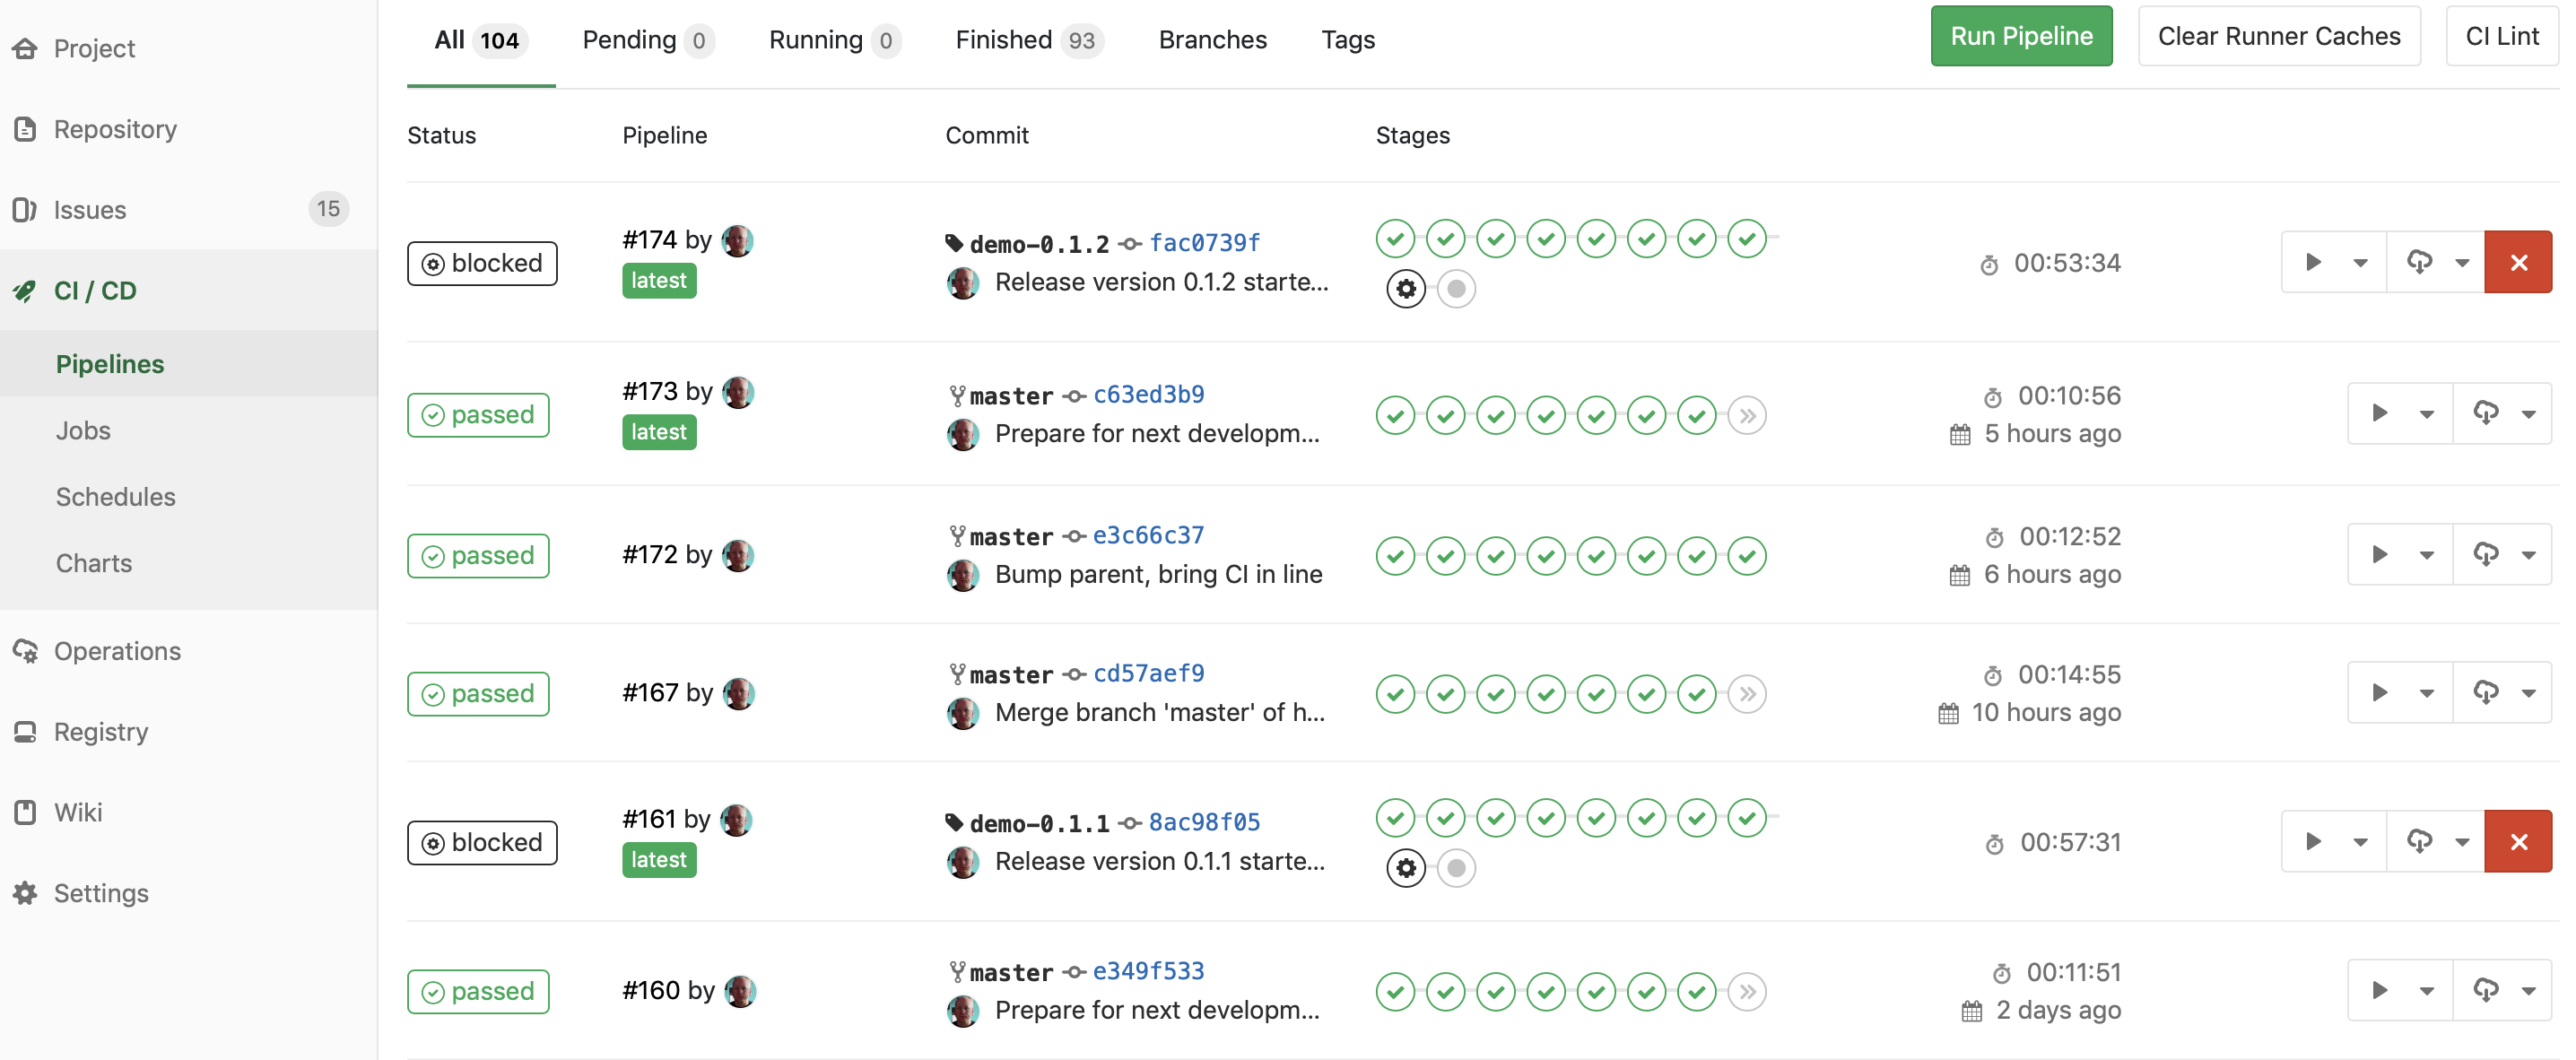
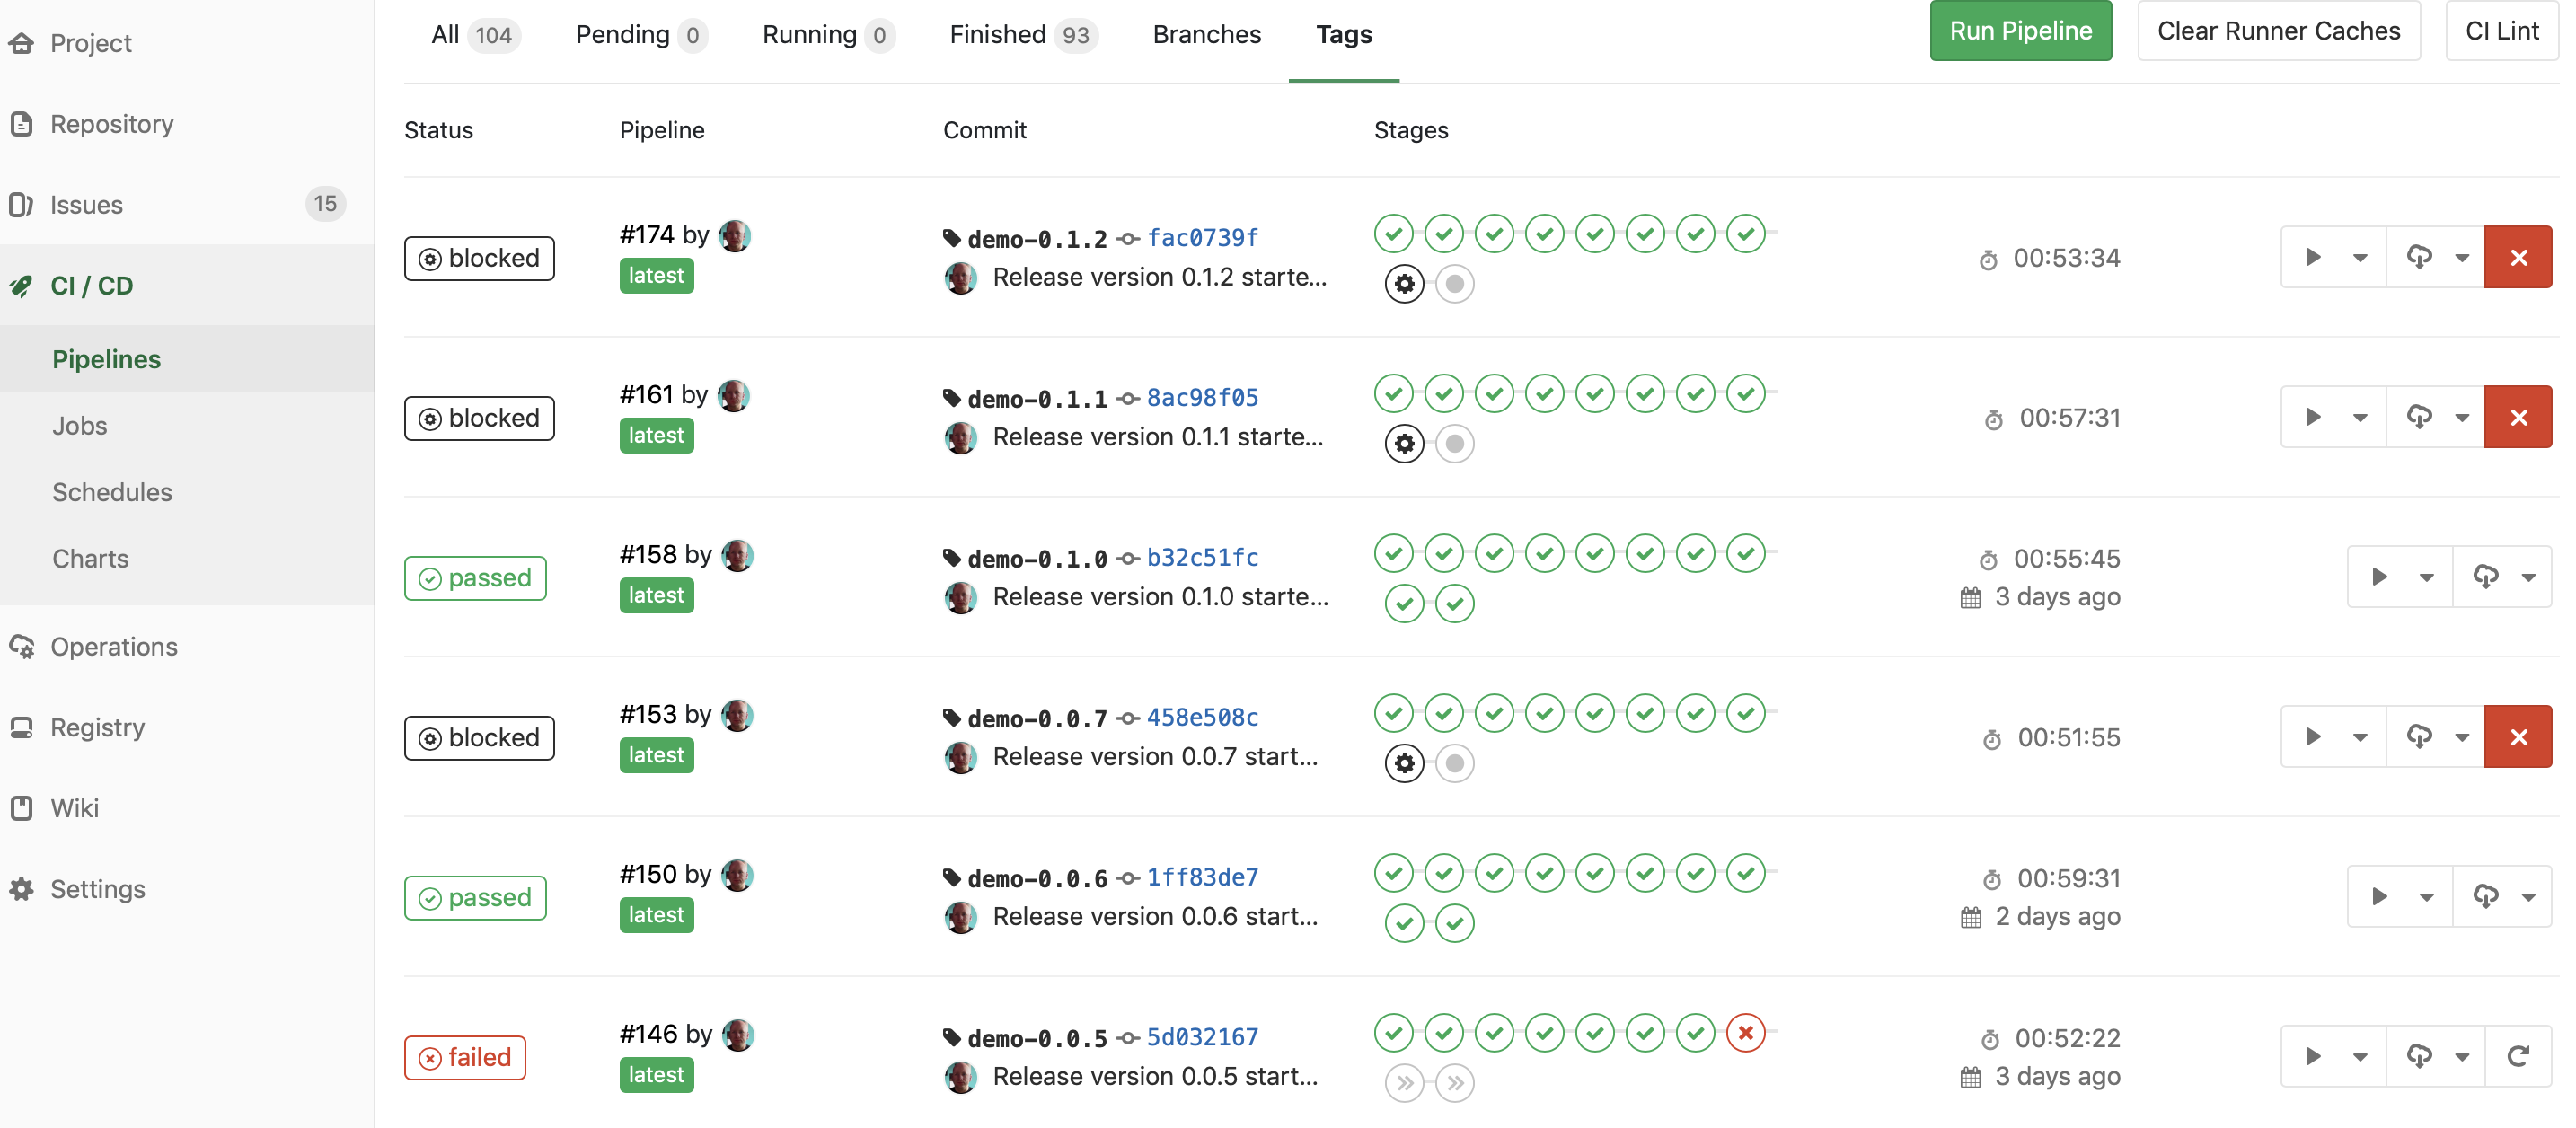
Short pipelines end at the “build release” action, which I can manually trigger to commit a new tag and spawn a new long pipeline. The long pipeline also builds everything under a tag, enabling me to also deploy to acceptance (here done automatically) and production (here blocked behind a manual approval). Since each release has a tag, I can go to the Tags overview and see just my recent releases:
Using my DTAP enricher and the Gitlab CI CI_ENVIRONMENT_SLUG variable, I can even support dynamic environments, which each get their own URL.
This gives me an environment overview that can look as this:
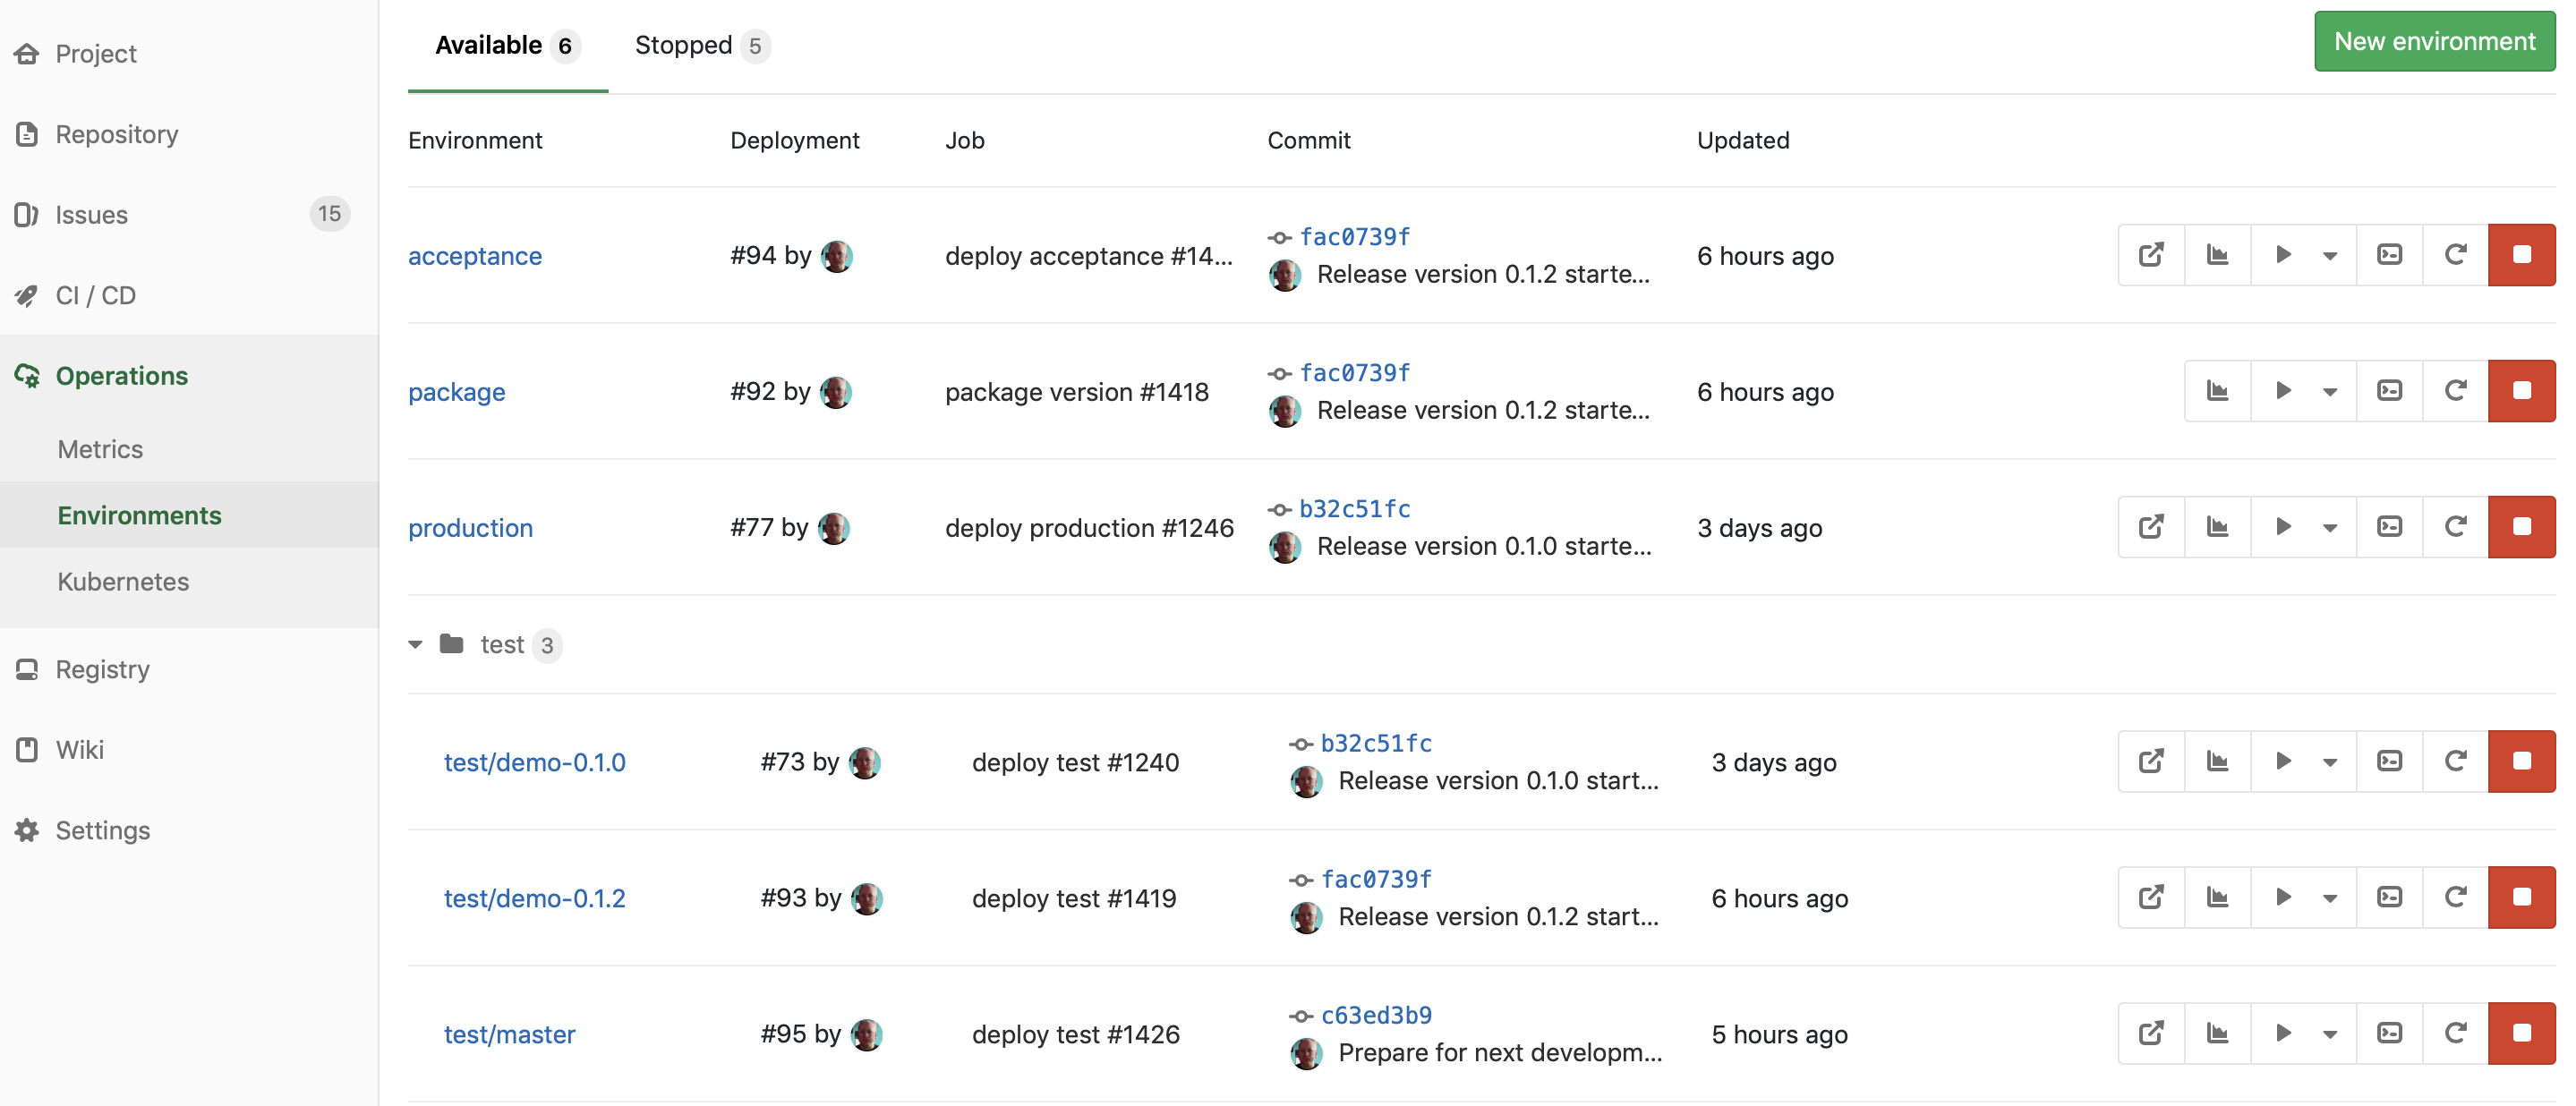
The package environment is still an artificial one I need to build my Docker image, the acceptance and production environments are regular static environments, and I can add as many intermediate test environments as I want (for some customers, we have upwards of 10 different environments for different purposes), but most interesting is the three test environments. The bottom one is named for its branch (master), while the others are names for their tags (demo-0.1.0 and demo-0.1.2) created during release. This means I can dynamically create an environment by just creating a new branch in my repository, and I can always go back and see what old versions did. These environments are automatically and dynamically provisioned on-demand.
I can stop an environment directly from the UI by clicking the reg stop button; this will automatically release the resources using Gitlab CI’s environment:on_stop functionality together with Fabric8’s
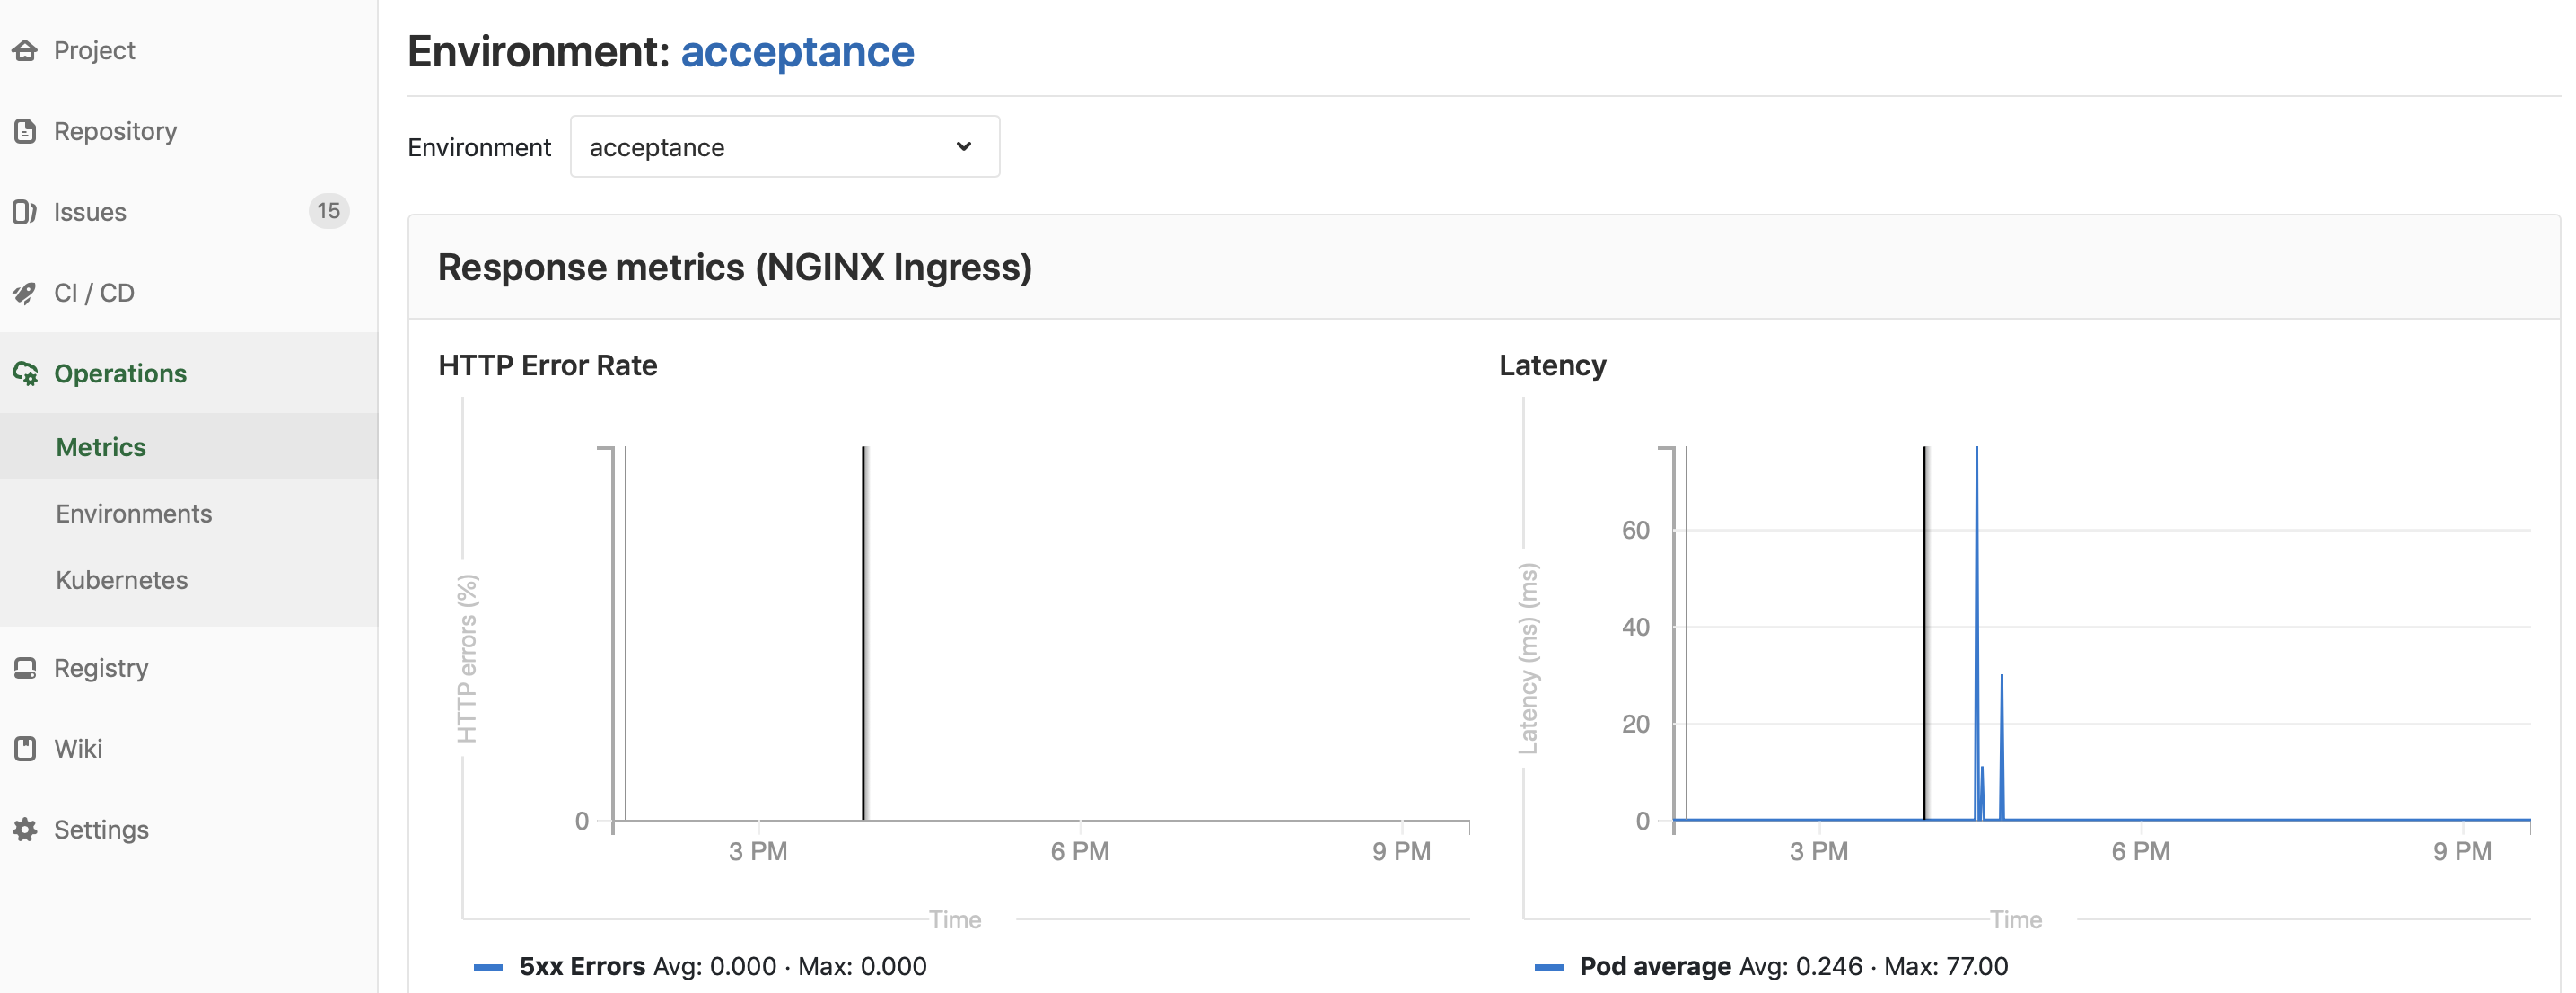
Since my cluster is managed by Gitlab including a provisioned Prometheus installation, I can get basic metrics about my application for each environment – even my dynamically provisioned ones – at a single click, here, for example, a test application on the acceptance environment:
The nice thing is that everything is integrated into a single application, Gitlab. I can always click from each screen to the ones logically belonging to it and see which commits belong to which release, who made the commit and who authorized the release.
Conclusion
In this series, we have built up a very powerful CI/CD pipeline based around Kubernetes and Gitlab. All is hosted in a cloud environment that makes very few assumptions about the underlying cloud provider. We make use of standard cloud services so we don’t have to deal with the lowest level maintenance tasks like keeping databases running and network infrastructure.
Gitlab is in a time of rapid development, and I assume that parts of this series will become less relevant in time (hopefully the object storage configuration will become simpler). I also have hopes that Gitlab finally will get a proper notion of a release (like it has for milestones and environments) so we don’t have to hack around spawning new pipelines. I am also looking forward to a couple of improvements that will make my setup nicer, such as automatic docker registry cleanup (scheduled for 11.4) and native support for GCS in Gitlab runner 11.3. I am also looking forward to cloud-native support for Gitlab Pages, so all the reports I generate as part of the pipelines can be nicely available as well.
My next steps are to hook up the project-specific Prometheus data collectors to the alert manager running in the central cluster, so we can get alerts when something is wrong with an application and to nicely display application-specific metrics (as exported using Spring Boot or otherwise), either inside Gitlab or using Grafana.